
Document made using only Xara Page & Layout Designer and no other graphics or software tools.
Page 1

Read Me First
This is a short tutorial, and a working document you can experiment on.1) The Designs Gallery
You can see all the document templates and graphics that are available when you purchase the product by moving your mouse pointer over the ‘Designs Gallery’ label on the right side of the window. The Designs Gallery content is separated into folders, open a folder by clicking the folder icon or double- clicking the folder name. Items shown in blue folders can be opened and those in red folders are available immediately after purchase.2) Edit the Named Colors
Move the mouse pointer over the left end of the Color line at the bottom of the screen and right-click on any of the square color patches. Select ‘Edit’ to display the color editor, and you can now edit your document’s theme or ‘named’ colors. You might notice the header, footer, even the text headings always remain shades of the color you choose.3) Edit the text
Click the big T icon on the left set of tools (the Text Tool). Now click on any text and start editing. Try editing this text, or the white headings at the top of this page. When using the Text Tool, the top bar (called the InfoBar) allows you to change font, size, Style. The ABC icon is a spell checker control. Text editing is like any word processor, for example, drag to select text.4) Re-arrange your objects
Now let’s try some object moving and resizing. Choose
the Selector Tool (the large arrow at the top) and drag
on the photo on this page. See how the text flows
around it. Try dragging on the large page heading.
To resize an object drag on one of the corner handles
shown around the selected object. Try it on the pale
flower symbol at the bottom of this page. Click on it
with the Selector arrow, then drag a corner handle.
This flower and the page headings are special in one
other way - they are ‘Repeating Objects’ and appear at
the same position on every page of your document.
More details on this later.
To rotate an object click on it again so you get rotate
handles in the corners. Drag on these to rotate the
object. Try it with the petal shape, or one of the text
headings, or the above photo. This way you can easily
move, resize and rotate just about anything on the
page.
This photo is set to repel text around it, as you can see
if you drag it around.

An introduction


Document made using only Xara Page & Layout Designer and no other graphics or software tools.
Page 2
5) Customizing your photos
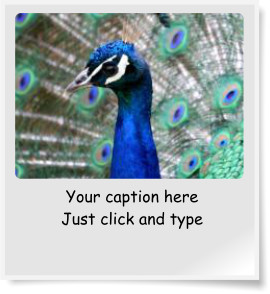
To add a photo to any page, simply drag and drop a photo file from the Windows File Explorer. If you drop the photo on the page or on top of some text, it is added as a new photo. If you drop the photo on top of an existing photo, it will replace that photo. Try it on one of the photos in this document. Try the Photo Tool to enhance your photos. Select the Camera tool from the left tool bar. Now click on any photo and, using the controls on the top InfoBar, adjust the various settings such as brightness, color, etc. The last slider control alters the blur / sharpen. This picture frame is one of many available in the Designs Gallery (see Page Elements > Photo Elements > Photo Frames).Repeating Objects
It’s common to have some items which are the same on all pages of your document. The heading text, the header design, and the page footer in this document are good examples. These are called ‘Repeating Objects’ and have a small flower symbol, like this, shown in the top right corner when they are selected. It’s easy to create your own repeating object. Try adding an object to this page, say a photo, or draw a rectangle, or perhaps some clipart. Using the Selector Tool select the item and the menu: Arrange Repeat
on all pages.
In the Page Gallery on the right you can see the item is
now repeated at the same position on all pages. If you
change it, all copies are updated.
If you edit the text of the footer of this page you’ll see
Repeat
on all pages.
In the Page Gallery on the right you can see the item is
now repeated at the same position on all pages. If you
change it, all copies are updated.
If you edit the text of the footer of this page you’ll see
the edits are reflected across all pages.
Text Tool
You can create three types of text object. On a blank area of the page you can: 1. Click and just type. This creates a simple, single line text object. or 2. Click and drag rightwards to create a text column, and type. You can drag the ends of the column to adjust the width. or 3. Click and drag diagonally to create a text area.Text Areas & Columns
When text overflows the bottom of a text area you see a 'flow arrow' that you can drag to any other empty text frame to create a flowing text story. Or click on the overflow arrow and turn on the option to create new pages automatically. Now when your text area overflows, a new page is added for your text to flow onto. The text areas in this document are set to automatic, so if you overflow page 4 with text you will see page 5 get created.


Document made using only Xara Page & Layout Designer and no other graphics or software tools.
Page 3
You can ask Page & Layout Designer to arrange your
text areas for you, to quickly make a 1, 2, 3 or more
column page. Right click in the text and choose
Columns... Enter the number of columns you want and
the gap between them. Press Convert and the text
areas on the page are reformatted. If other pages in
the document have exactly the same layout, you’ll be
asked if you want to make the same formatting change
to those other pages.
, but this time it’s
embedded inline. To embed
an object just select and copy it (Ctrl+C),
place the text caret where you want it and paste
(Ctrl+V).
Text flow around
To make any object repel text, right-click on it with the Selector Tool and select Repel text under. Now, as you move the object around the page, it repels text. You can also anchor graphics to text. This means that the graphic can move with the text. The small flower graphic on the left is an example - add a few empty lines into the paragraph above to see it move down. You can also embed any object into text as if it were a character. Here’s that same flower symbol, but this time it’s
embedded inline. To embed
an object just select and copy it (Ctrl+C),
place the text caret where you want it and paste
(Ctrl+V).
Text Styles
When using the Text Tool there is a Style drop-down menu on the InfoBar, that shows a list of Text Styles used in this document. ‘Normal text’ is the main body text of this document, and there are several heading styles. The ‘Heading 2’ style is the one used on top of this paragraph and others. To update the appearance
of all such headings, just select one heading, make the
required changes, such as font, size, color, etc. and
then in the Style drop-down select Update style.
Page selection and view
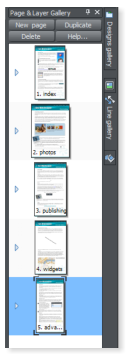
The Page & Layer Gallery is shown on the right side of the window. Just click a thumbnail to move to the required page. Click the small triangle next to each page thumbnail to expand the Gallery to show the layers on the page.Re-ordering and renaming
pages
Just drag the page thumbnail in the Page & Layer Gallery to re-order. To name a page, first select the page by clicking on it, and then perform a second click on the small page name shown on the bottom of each page thumbnail.Adding or removing pages
If you want to create a new page similar to the current one, just click this icon on the top bar. (Or the Edit > Pages menu.) If you want to add a new page from the templates in the Designs Gallery, just drag the page design onto the current document.Adding a page number
To add a page number (as shown in the footer), place the text cursor, right click and select Insert -> Page number.Google fonts
To access any of the 600+ Google Fonts, in the Text Tool click the font drop-down list and then in the Google fonts section click the Add link to show the Google font picker (this will take a few seconds the first time it’s opened).


Document made using only Xara Page & Layout Designer and no other graphics or software tools.
Page 4
The Google font picker allows you to filter by style,
weight etc. You can preview the fonts on the right, and
use the size slider at the top to adjust the preview size.
The best quality Google fonts are hand-tuned to look
good at small sizes (e.g. body text). Select the ‘High
Quality Body’ check box to list those.
Other Tools
Let’s explore some of the other tools and features of Designer. You can try these things on the ‘speech bubble’ graphic below right. Remember for most operations you must select the item first (click on it using the Selector Tool). Change its color: Drag a color from the Color Line below onto the shape. Or try the Color Editor (Ctrl+E). Change its size, position, angle: Using the Selector Tool just drag on the 4 control points around the shape. Give it a soft shadow: Select the Shadow Tool, and drag on the bubble shape. Adjust the controls using its InfoBar. Give it a graduated color fill: Select the Fill Tool (paint tin icon), and drag across your shape. Drag the ends of the arrows to adjust. Try dropping a color on the ends of the fill arrow. Or select an arrow end and try the Color Editor (Ctrl+E). Make it semi-transparent: Select the Transparency Tool (wine glass) and adjust the transparency value using the slider at the top. Better still: In the Transparency Tool, drag across the object. You’ve just given it a graduated transparency. Edit Shape: This is a little more advanced. Select the shape, go into the Shape Editor Tool (on the flyout menu of the fifth tool down). Then drag on one edge of the shape, or on one of the small control points. If
you’ve used vector ‘bezier’ editing tools you’ll be
familiar with this.
Publish your document for all to see
The final stage is to print or publish your document. You can create a PDF to send to people (see below) or use the unique ‘Web Document’ publishing feature of Page & Layout Designer. This creates an exactly accurate web version of your document, and publishes it on the web. You can use your own web space, or use the free web space included. To preview your web document, click this ‘Preview’ icon on the top bar. Select File > Publish Web Document to put this document on the web and get a link you can share.


PDF Export
If you want to send you document to someone
else, or get it commercially printed, you can save
it as a PDF by selecting File > Export.. and then
set the Save As Type to be PDF.
For commercial printing use the PDF/X option.